Are you looking to dive into the world of databases but not sure where to start? MySQL is one of the most popular open-source relational database management systems and a great place to begin your journey.
In this blog post, I'm going to demystify the process of installing MySQL on your local machine. From the initial download to the configuration setups, I will walk you through each step in a straightforward manner. Let's embark on this journey together and make installing MySQL a breeze.
Step 1 - Please visit the link: mysql.com/downloads, then select the "MySQL Community(GPL) Downloads" option.
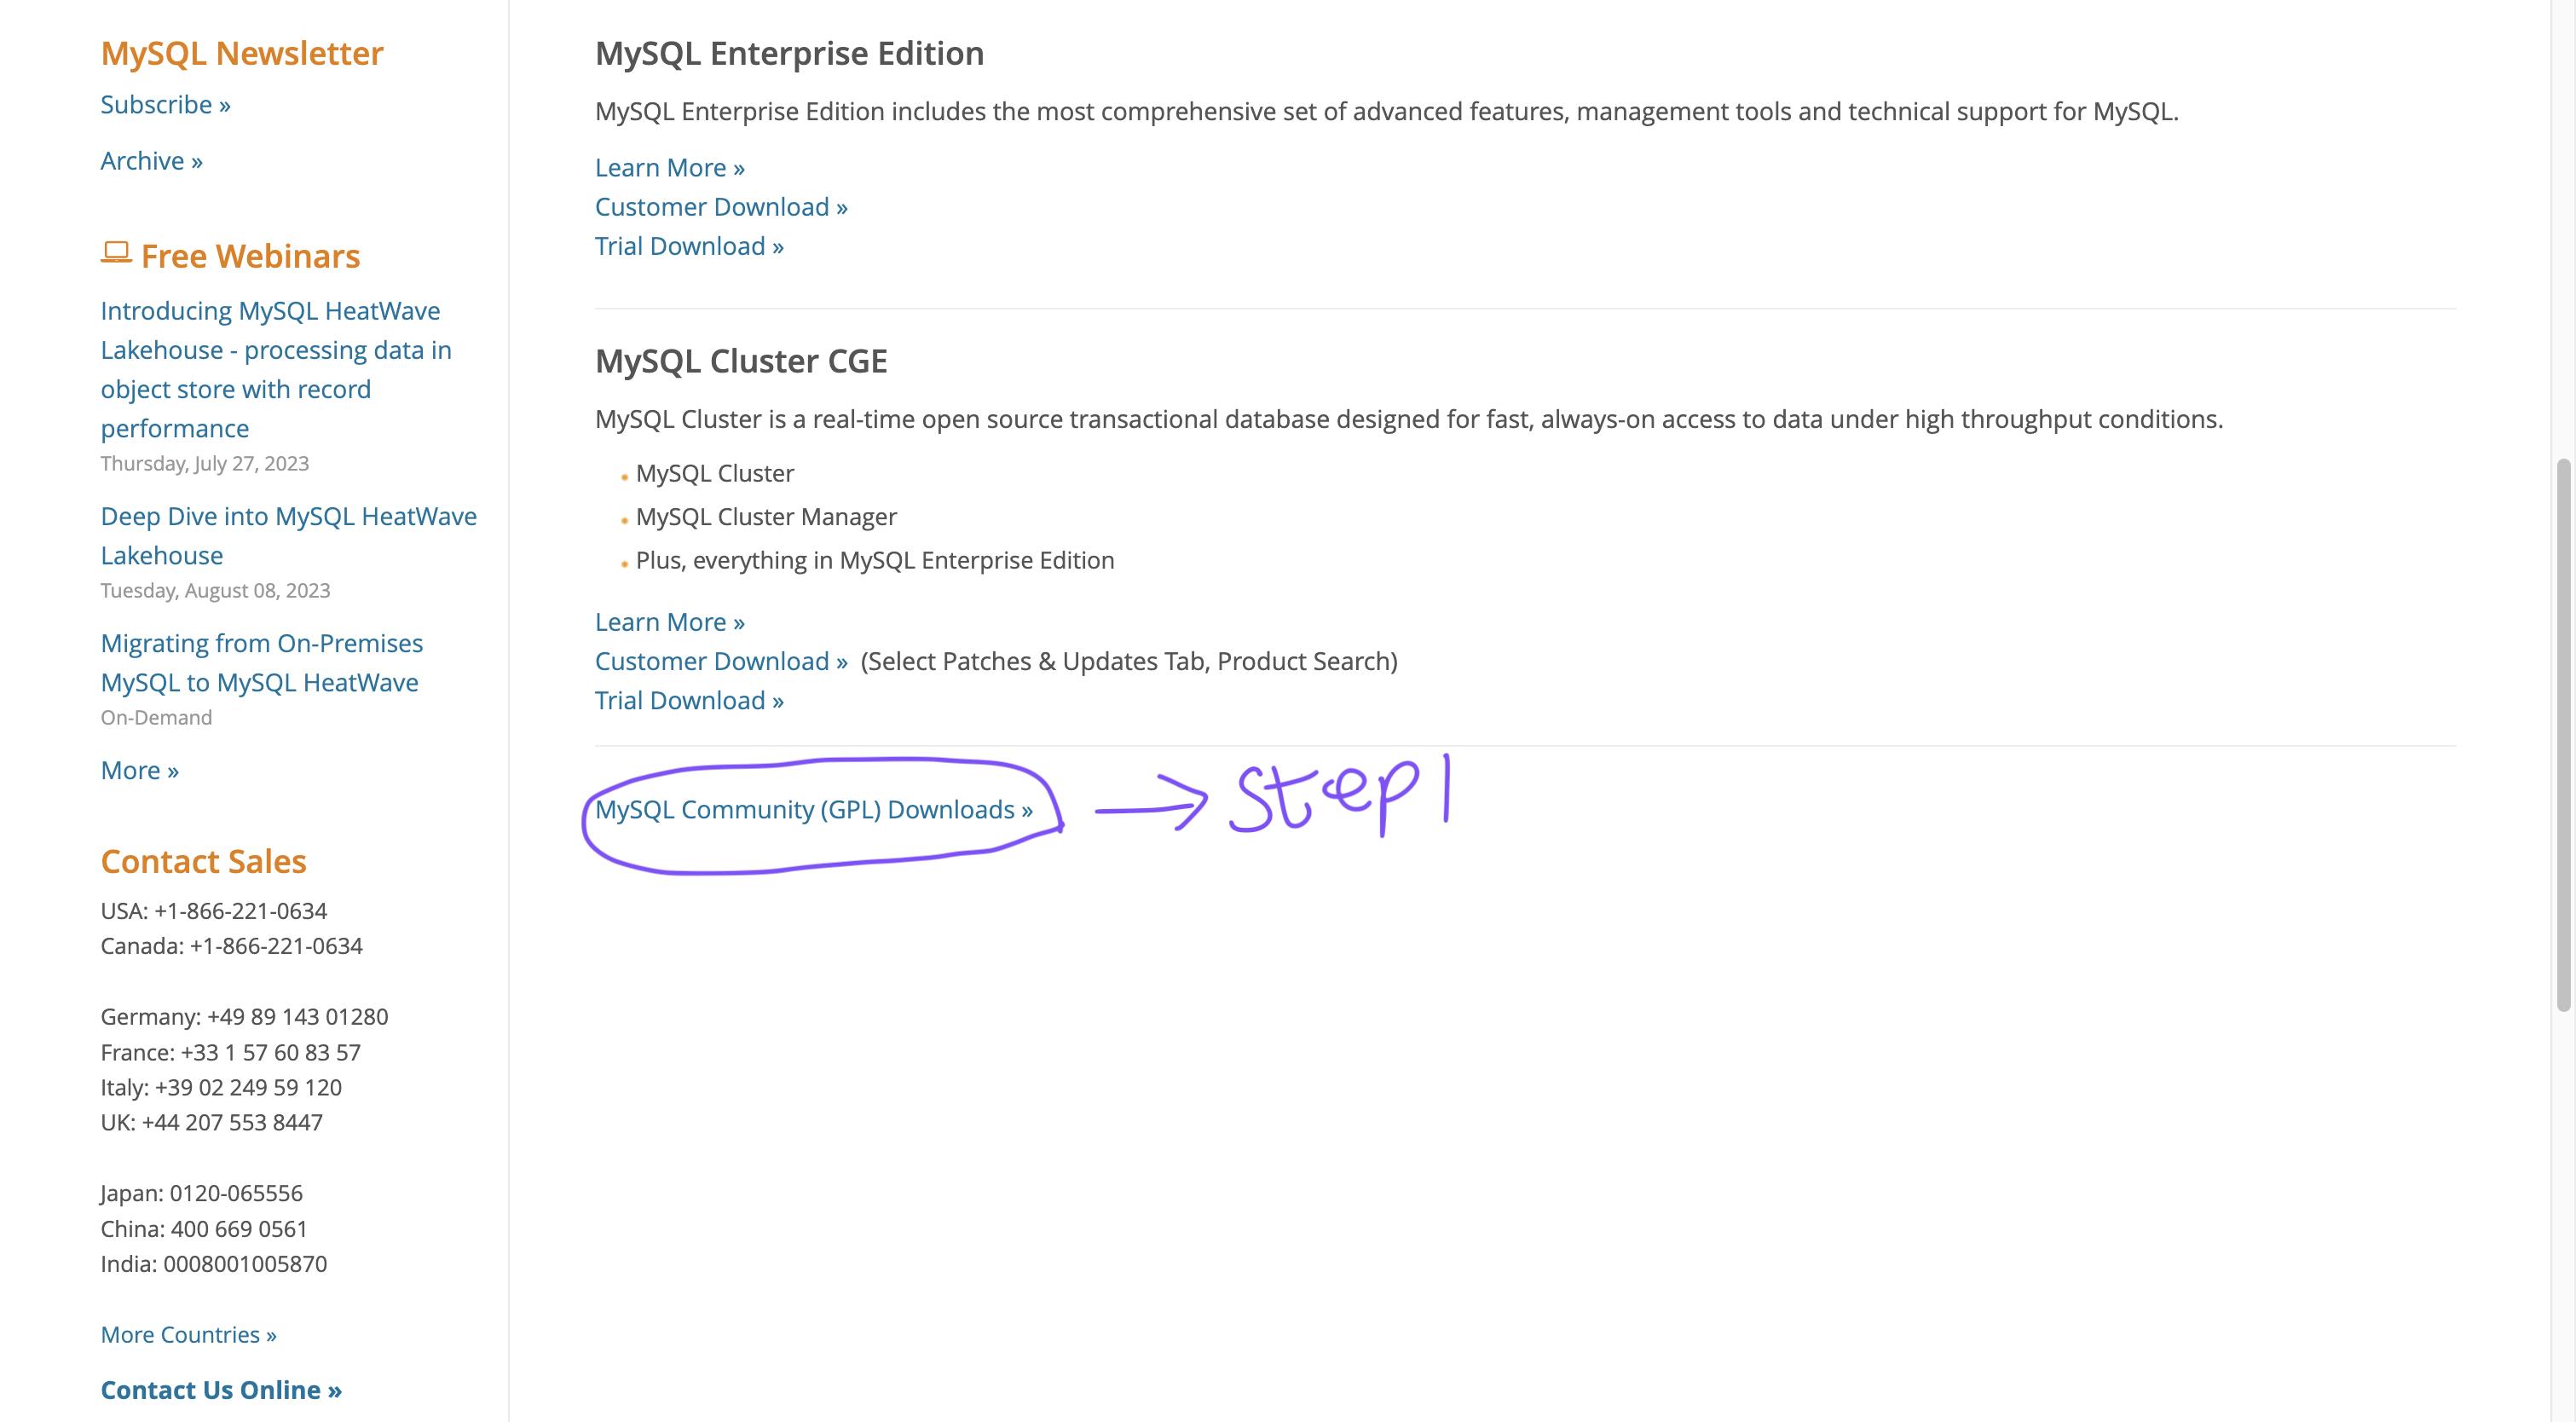
Step 2 - For the next step, please choose the option labeled "MySQL Community Server".
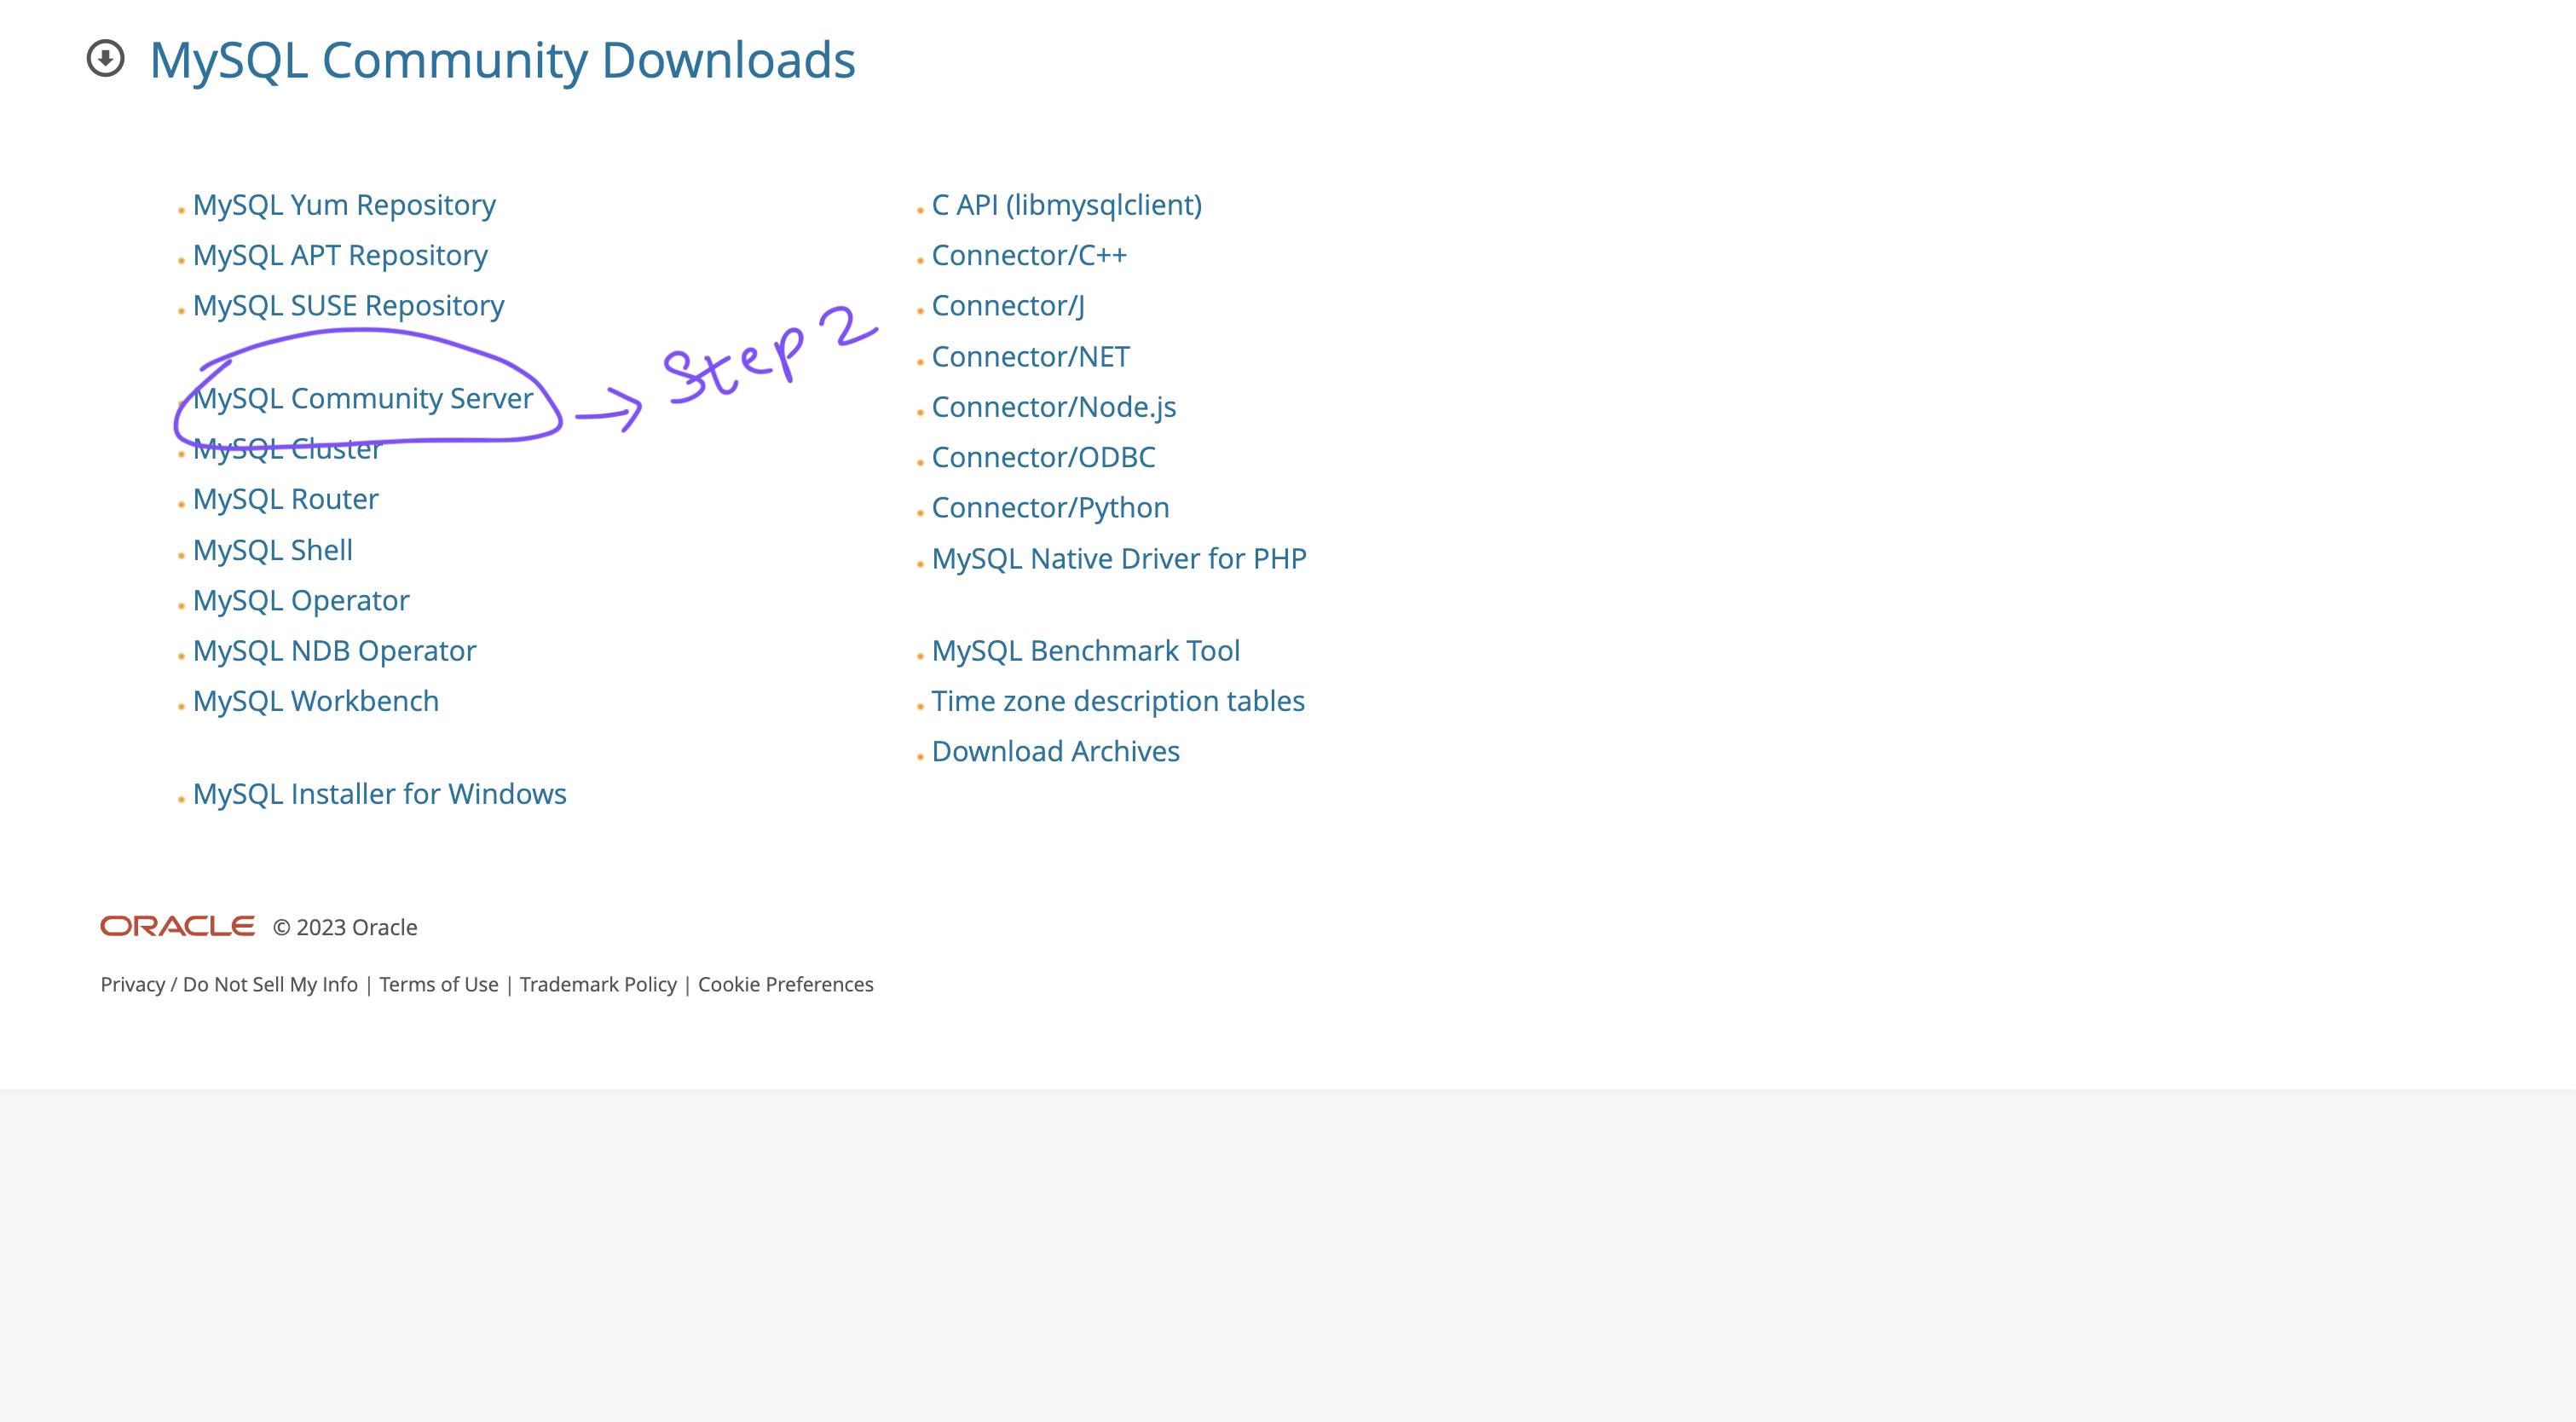
Step 3 - Ensure you know your operating system, and for a quick setup, opt for the (x86, 64-bit) version.
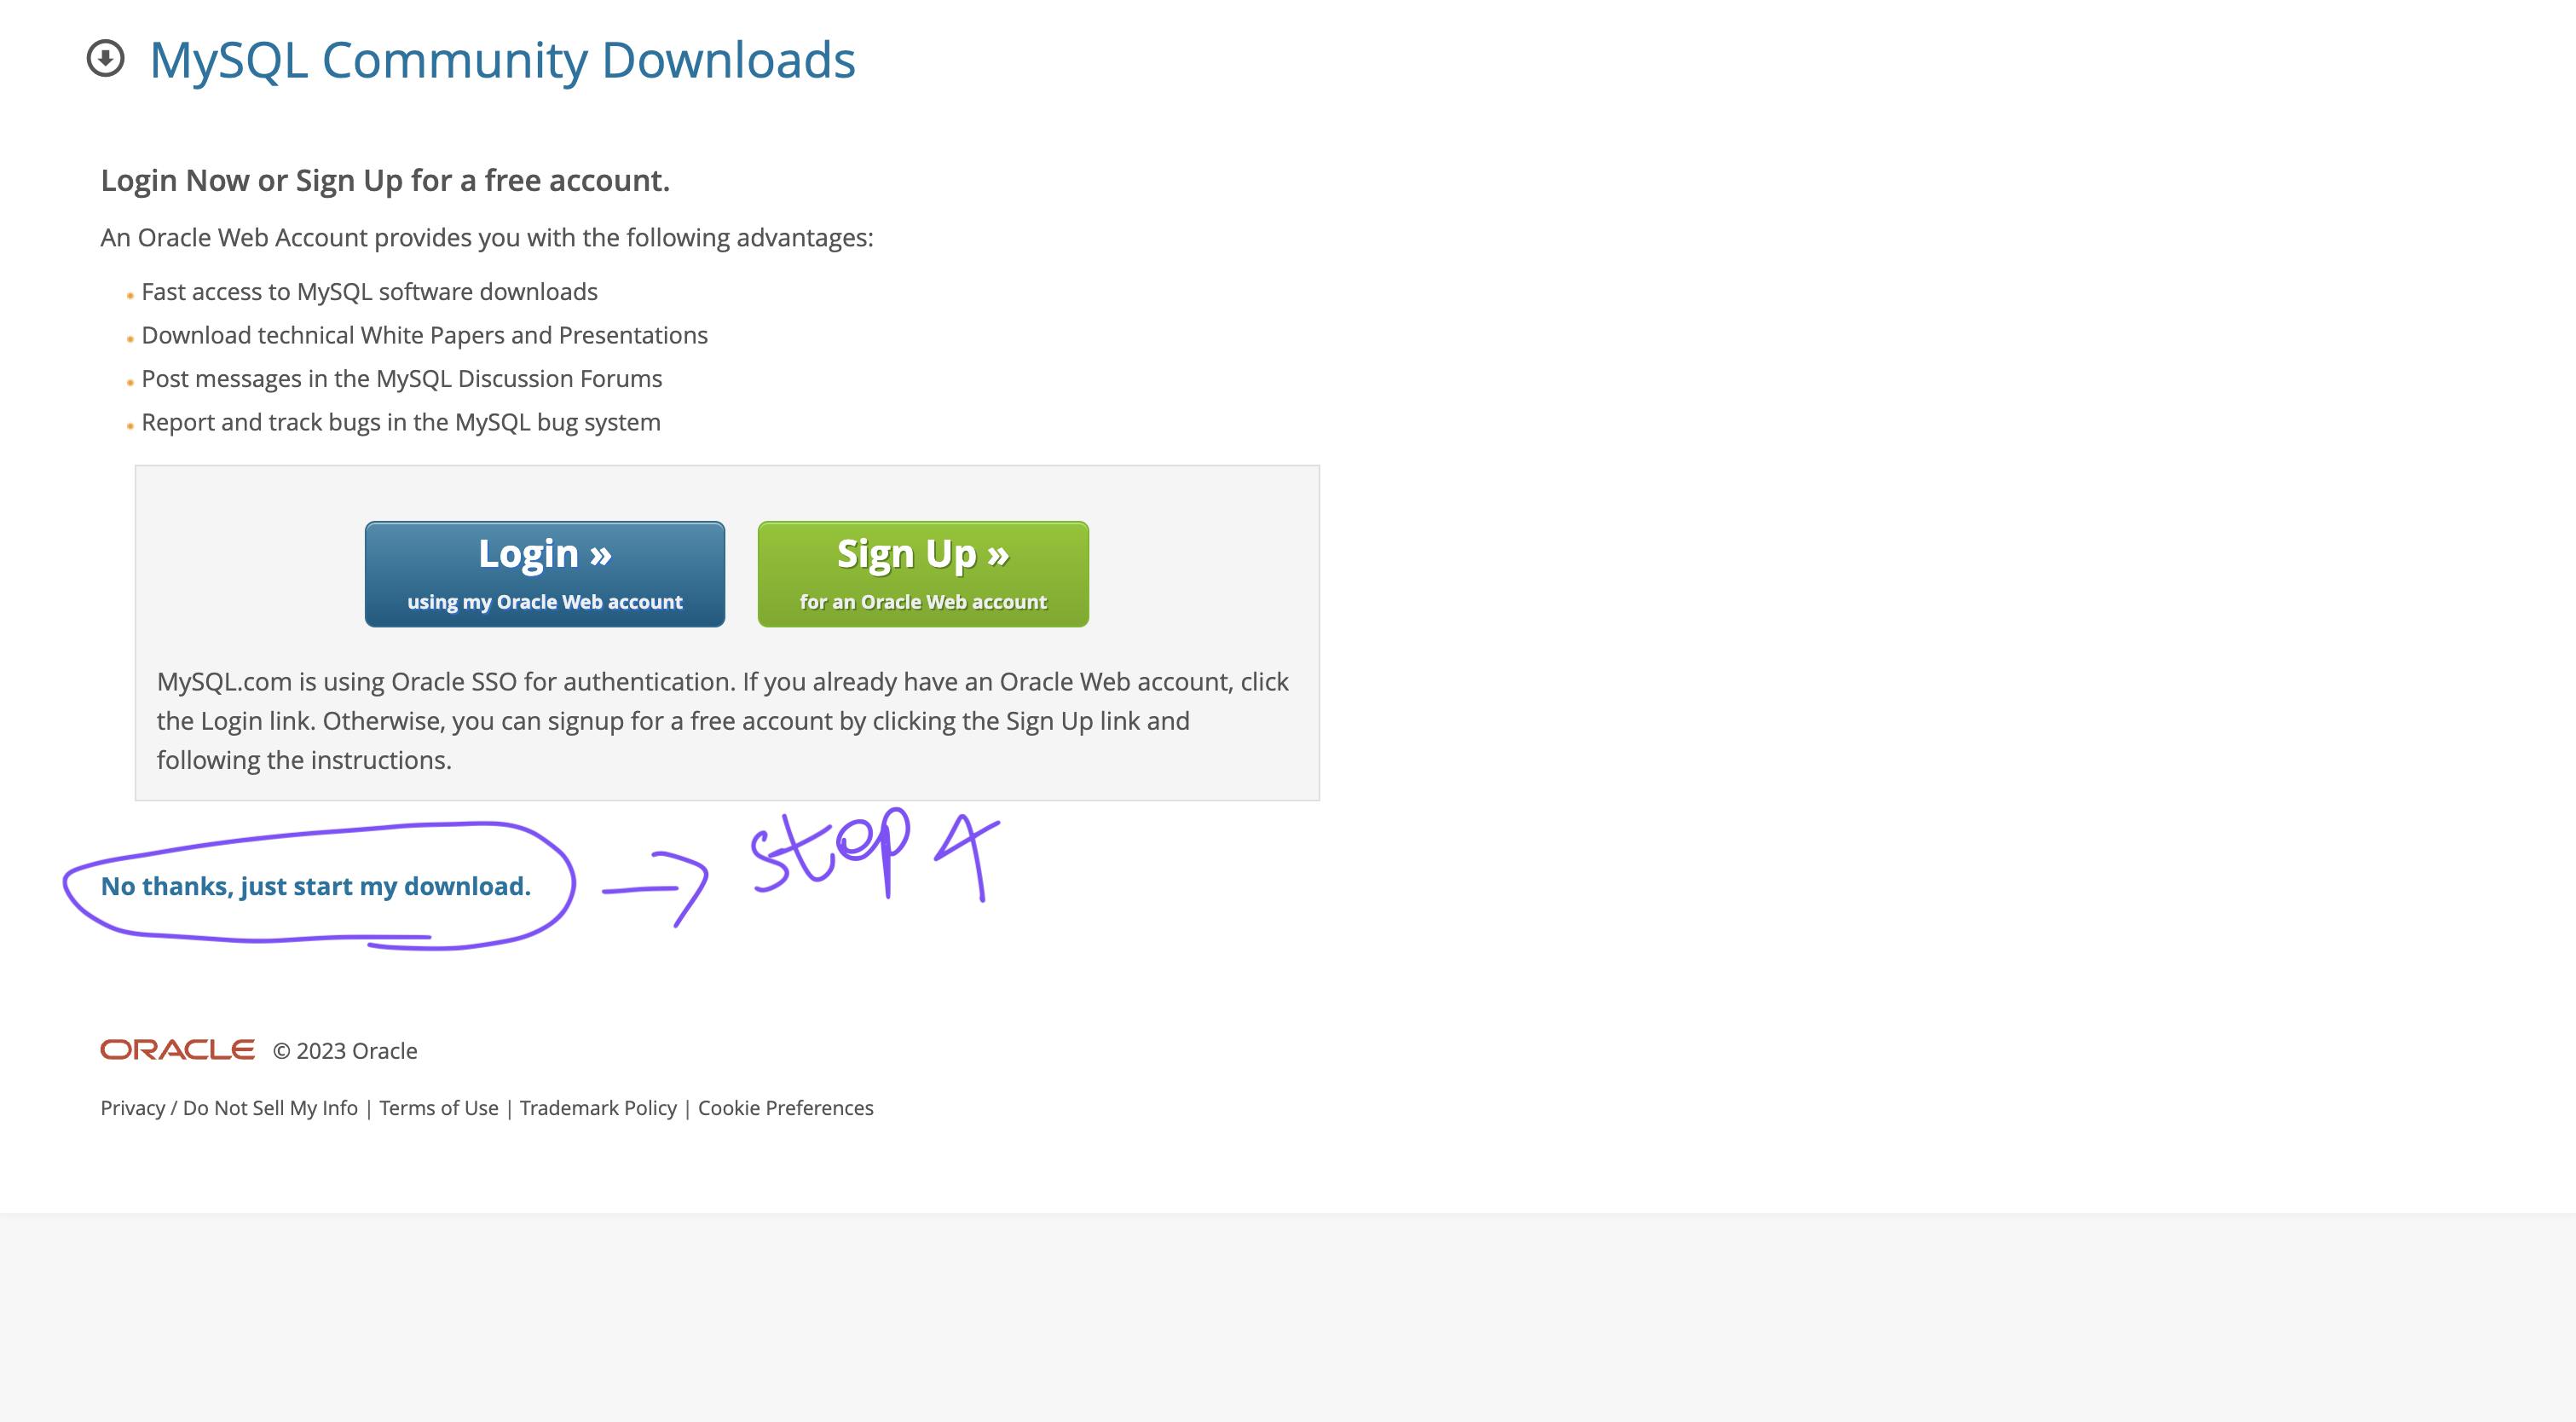
Step 4 - Feel free to initiate the download process at your convenience.
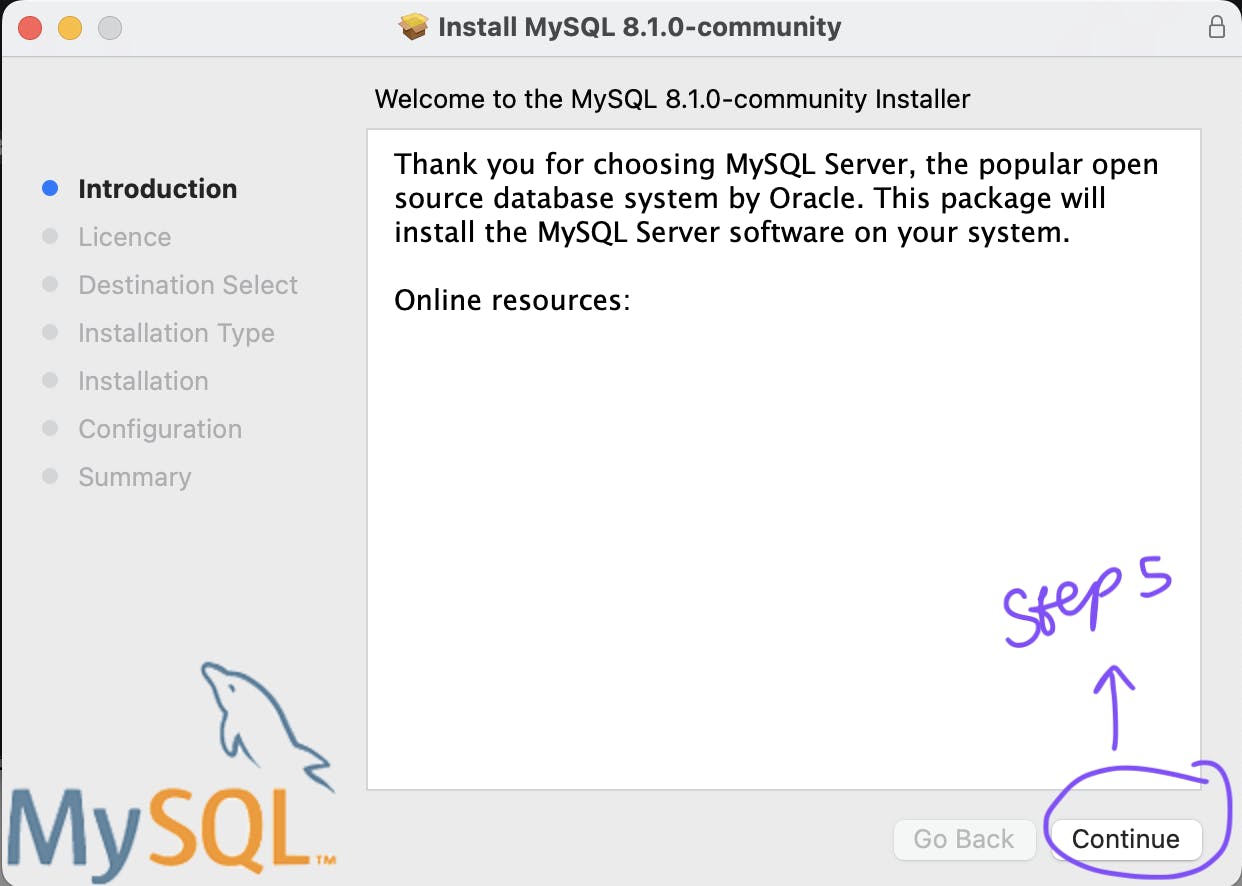
Step 5 - After the file has finished downloading, you can move forward with installing it on your local machine.
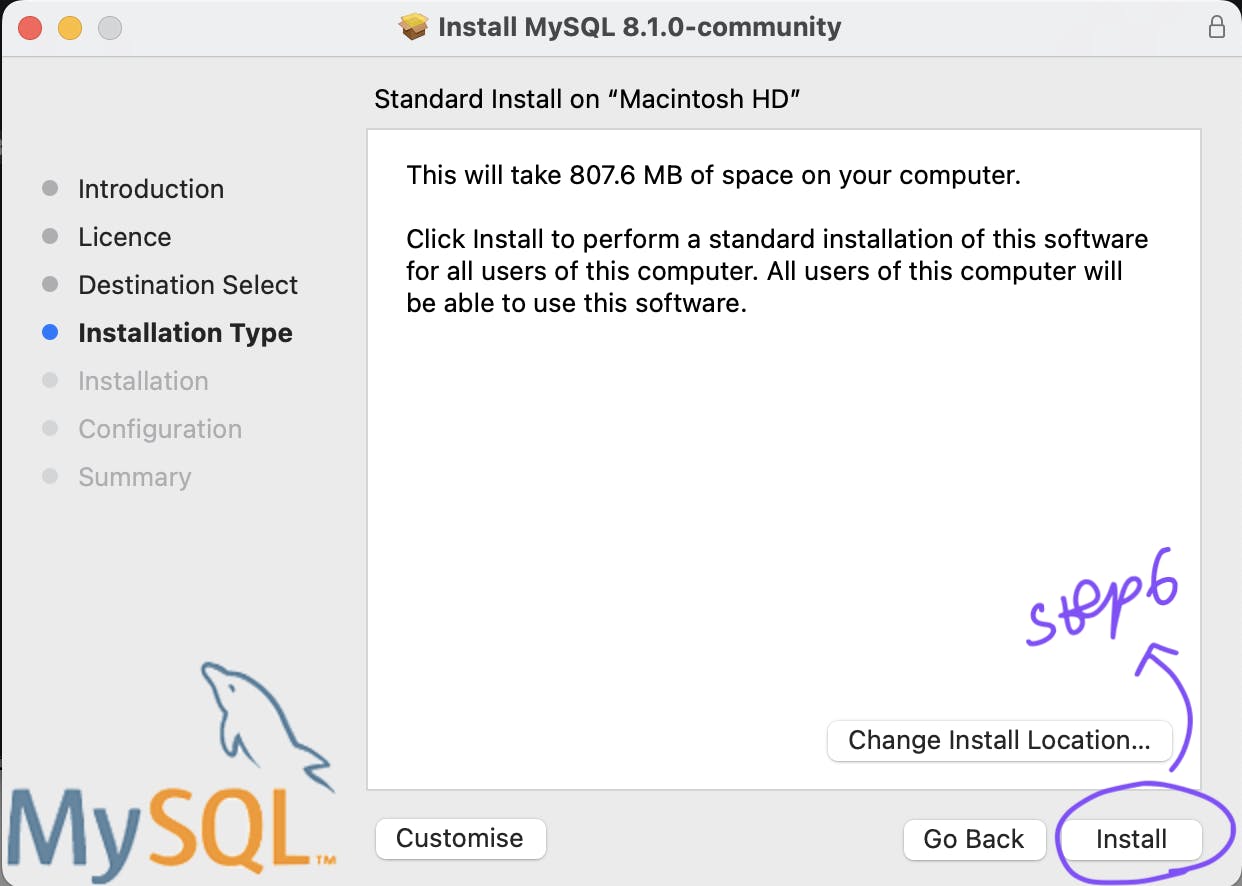
Step 6 - To proceed with the installation process, please accept the terms and conditions and click the "Install" button.
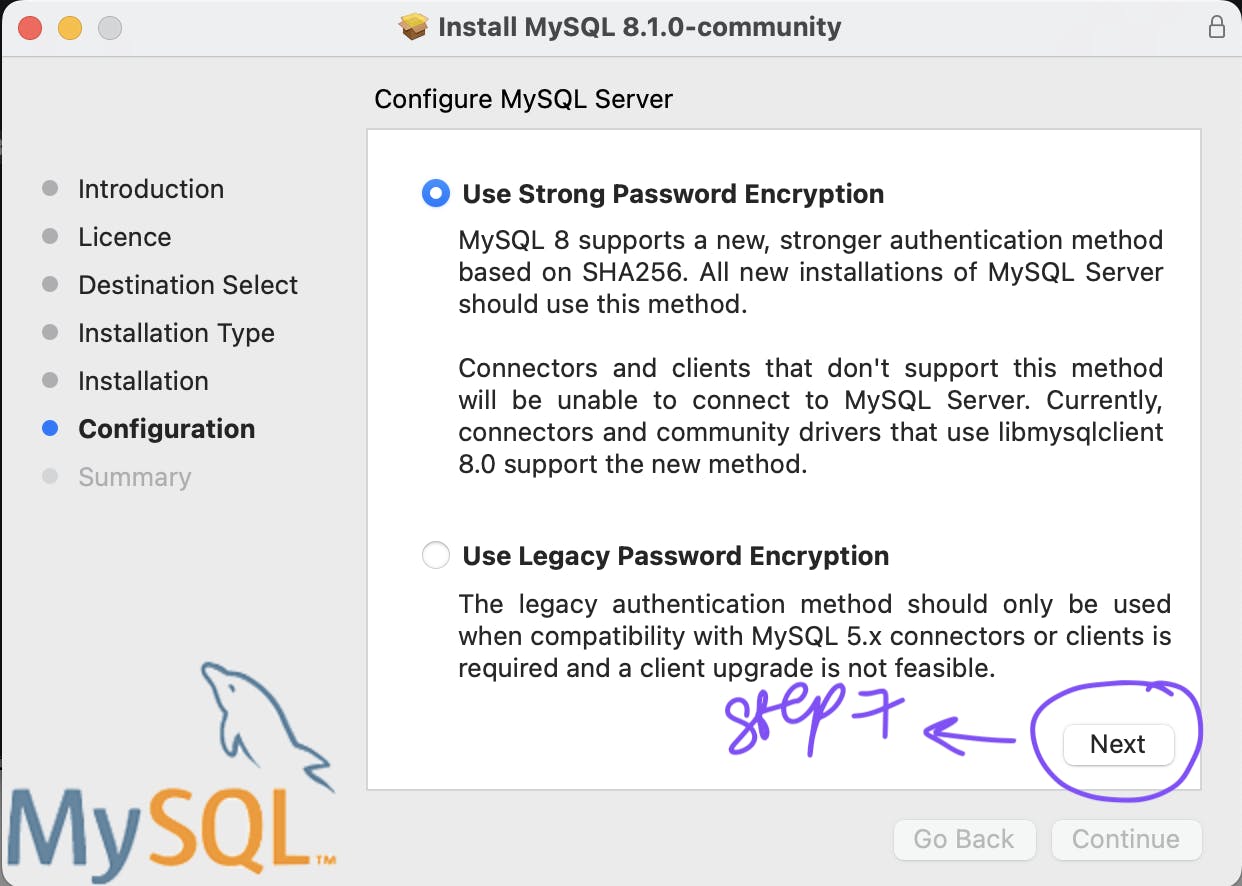
Step 7 - I highly suggest you set up a solid password to facilitate a secure connection with the MySQL Server.
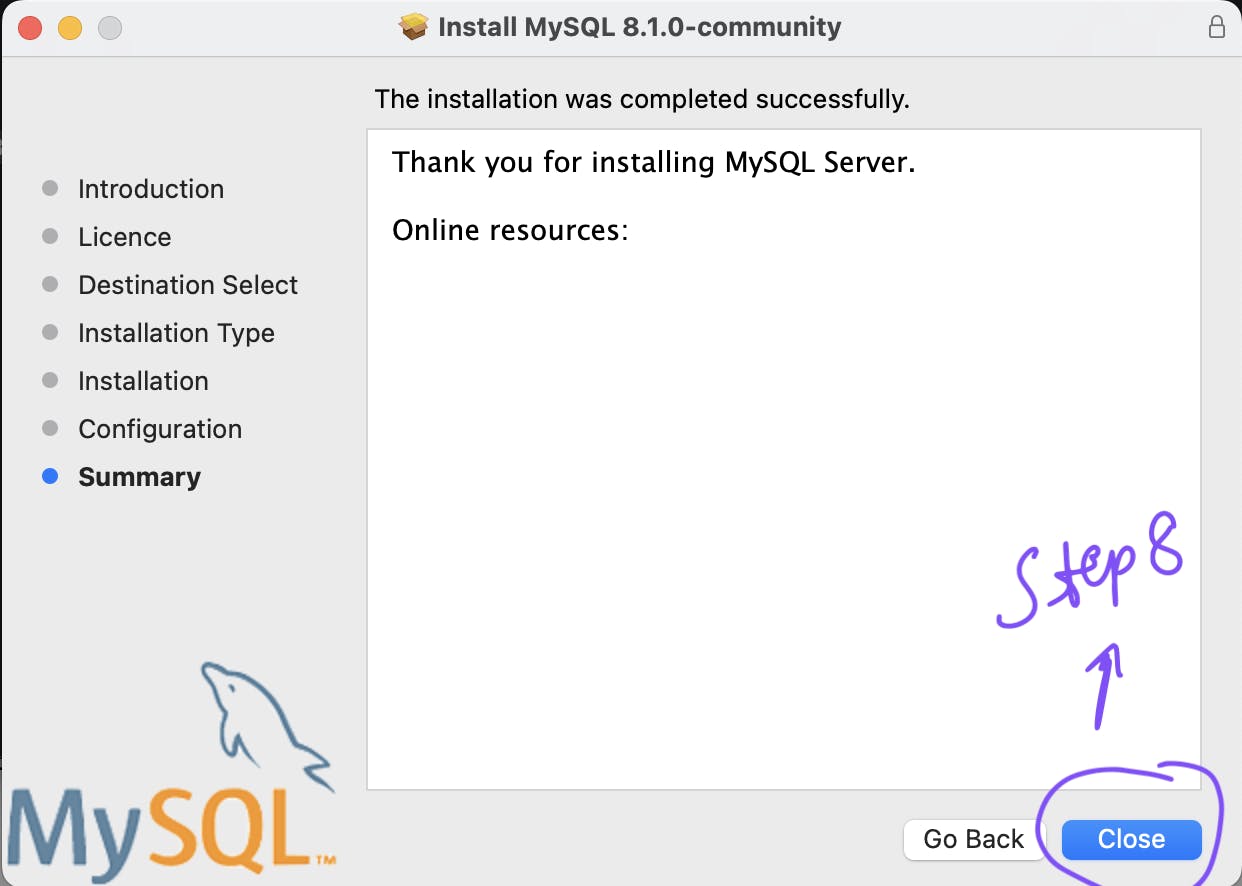
Step 8 - That brings us to the conclusion of the installation process.
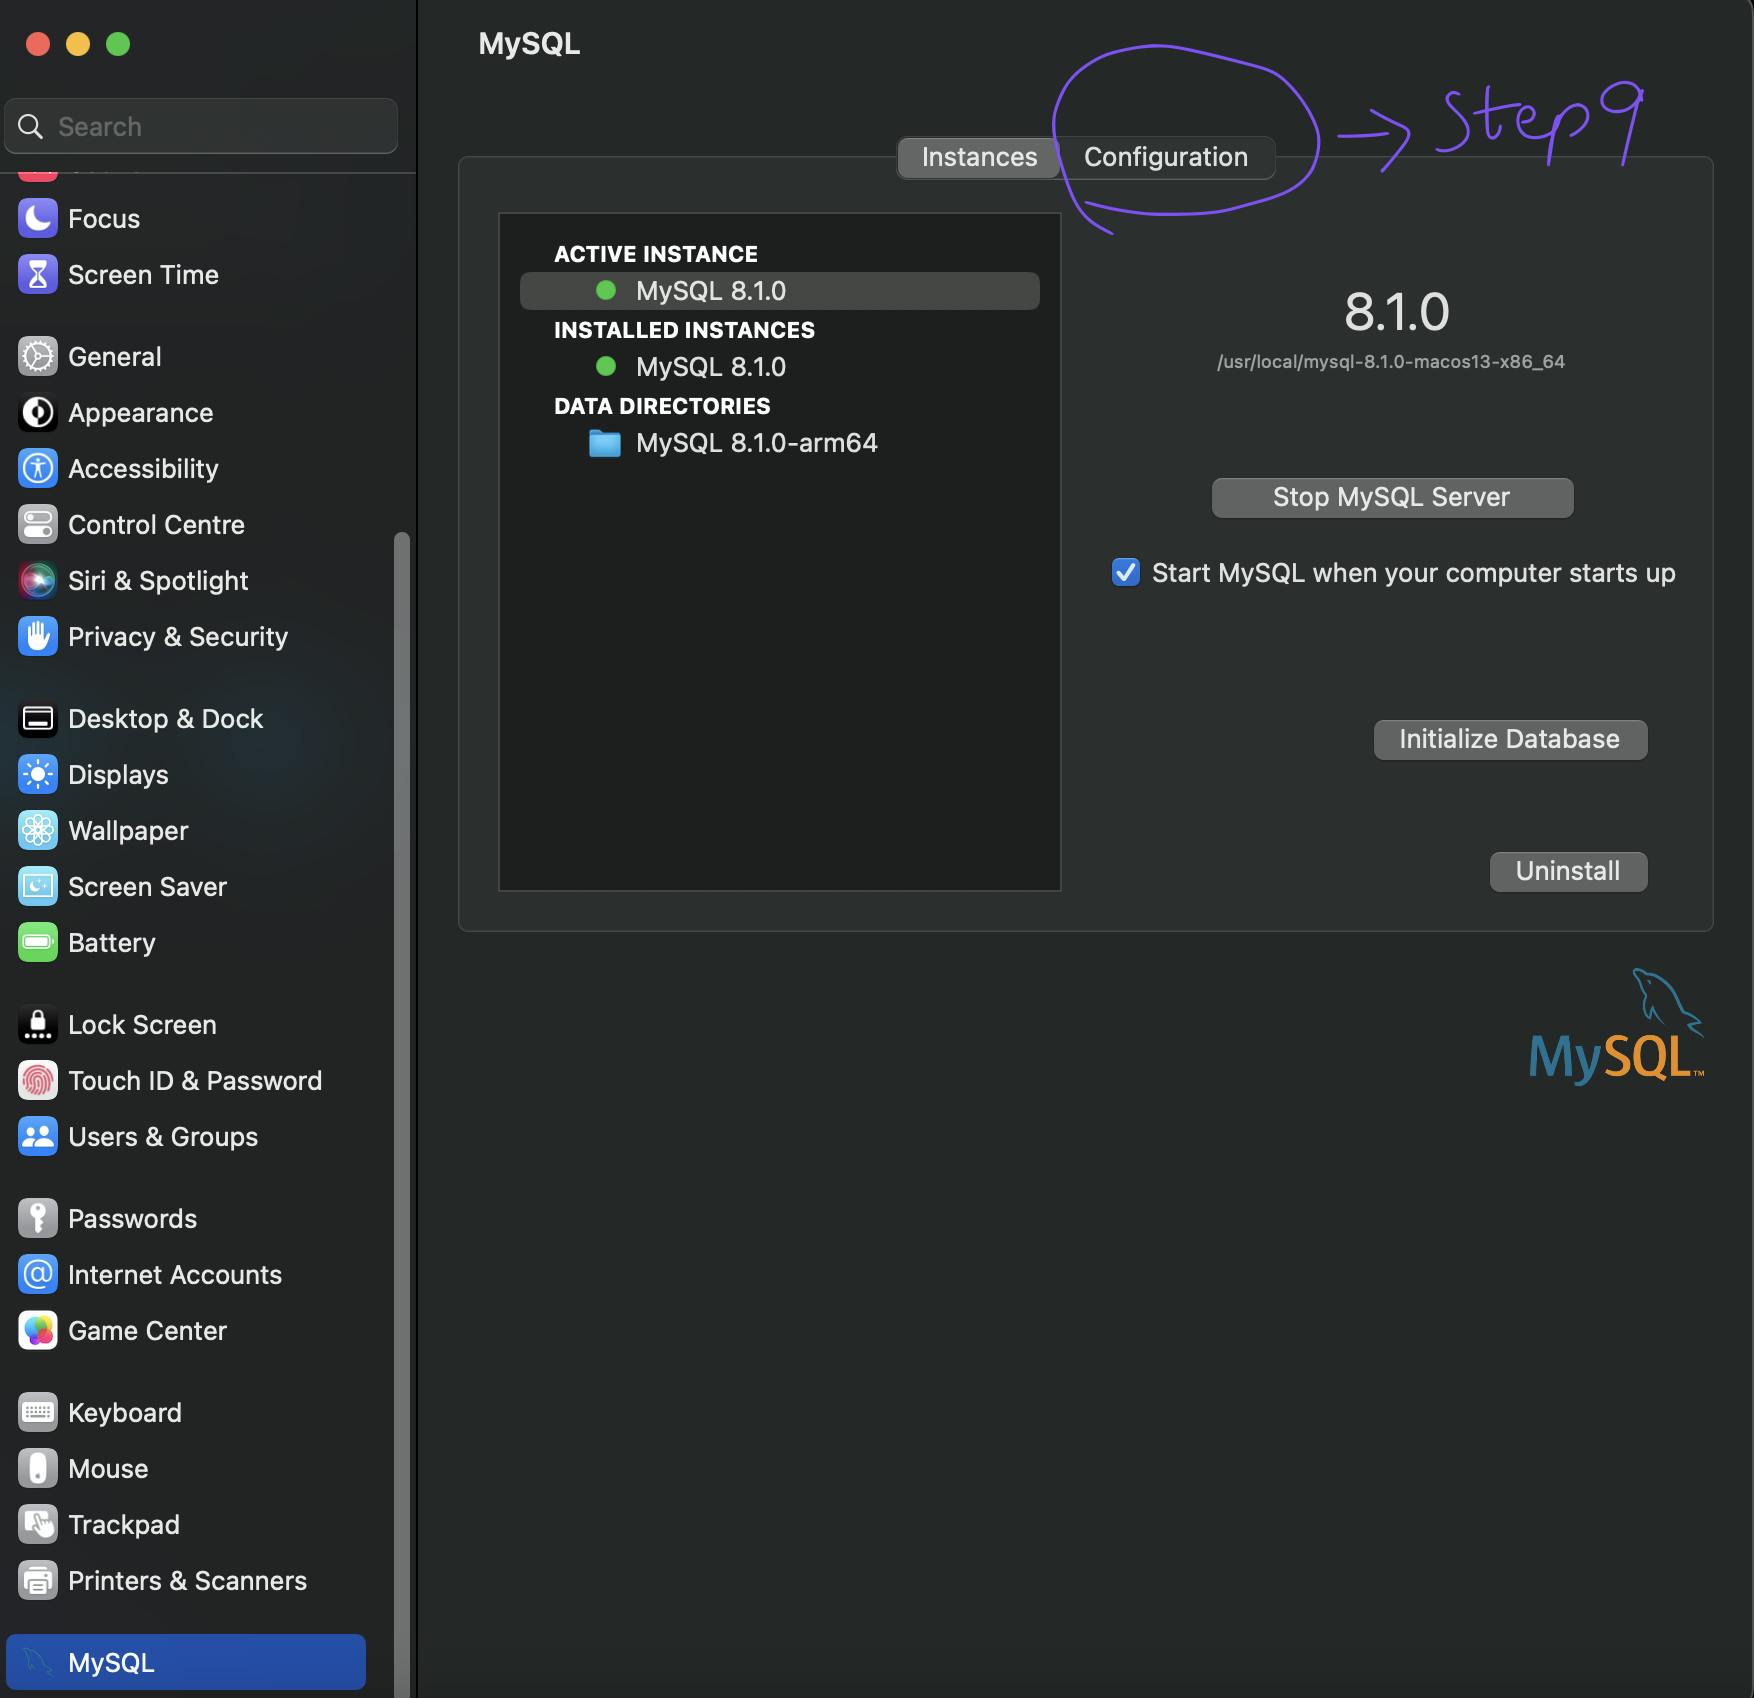
Step 9 - Before connecting to the MySQL server, it's essential to complete the configuration setups.
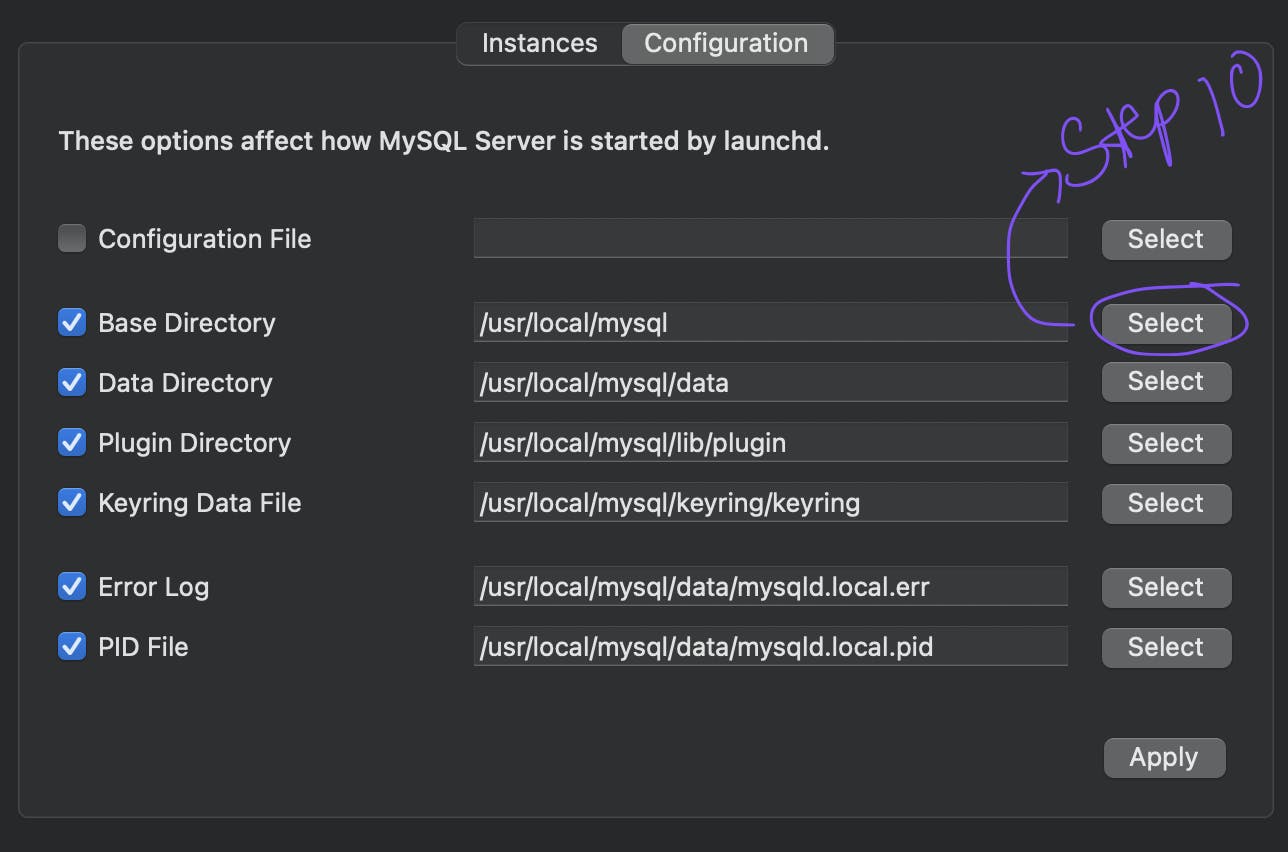
Step 10 - Change the Base directory file.
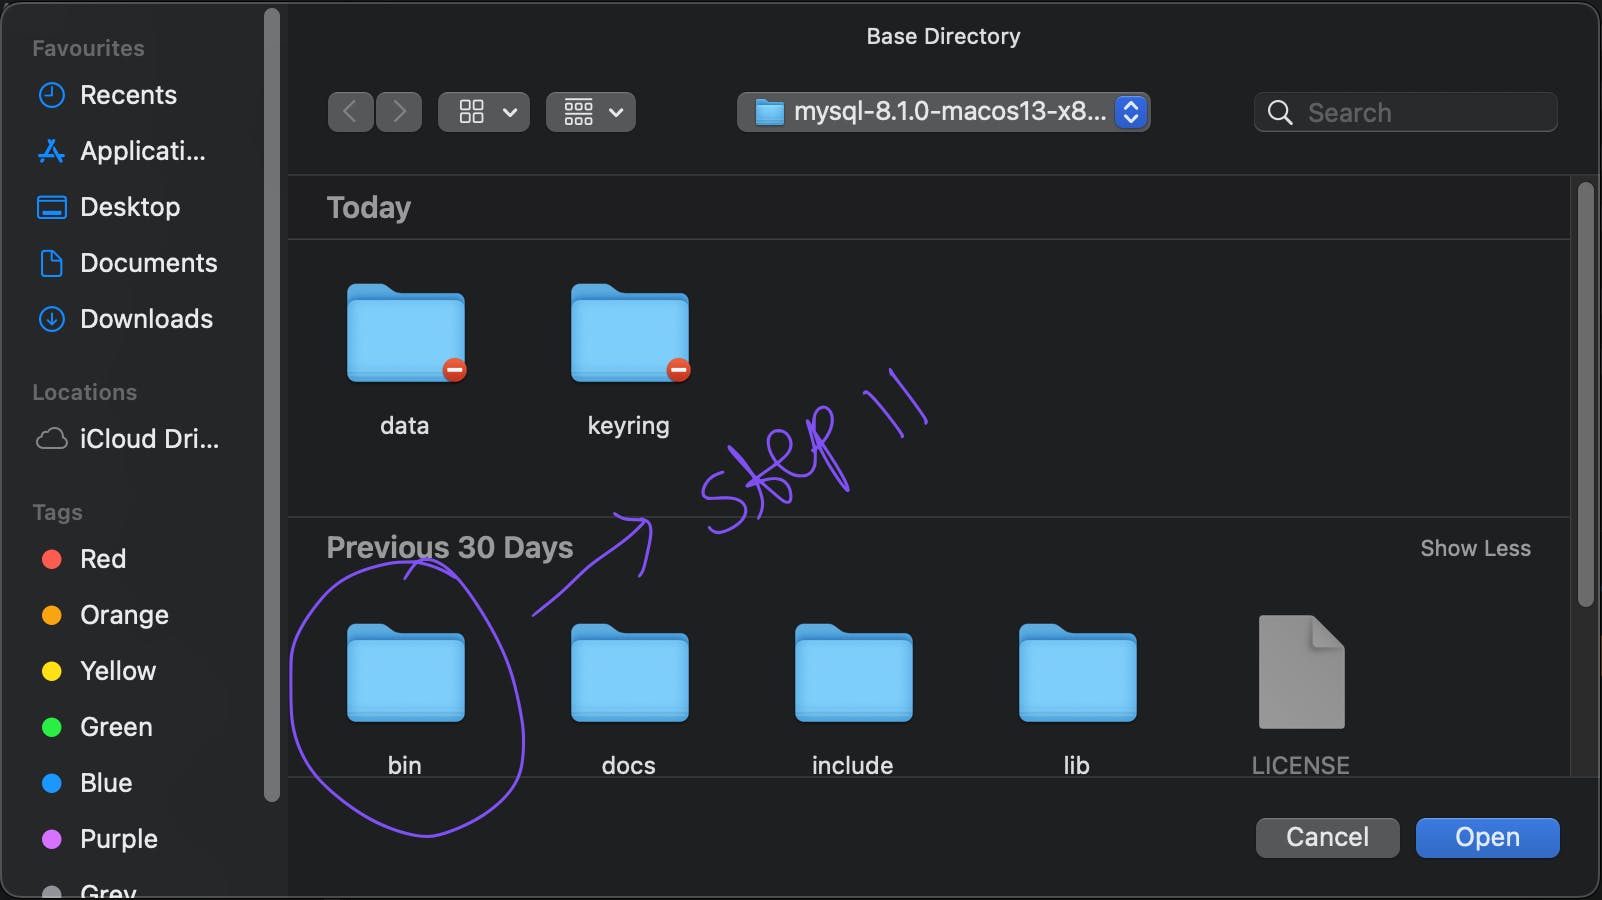
Step 11 - Select the Bin file located within the MySQL folder that you downloaded from the website.
Step 12 - Launch the Terminal and execute the following commands to test and confirm the proper functioning of the MySQL server.
/usr/local/mysql/bin/mysql -u root -p
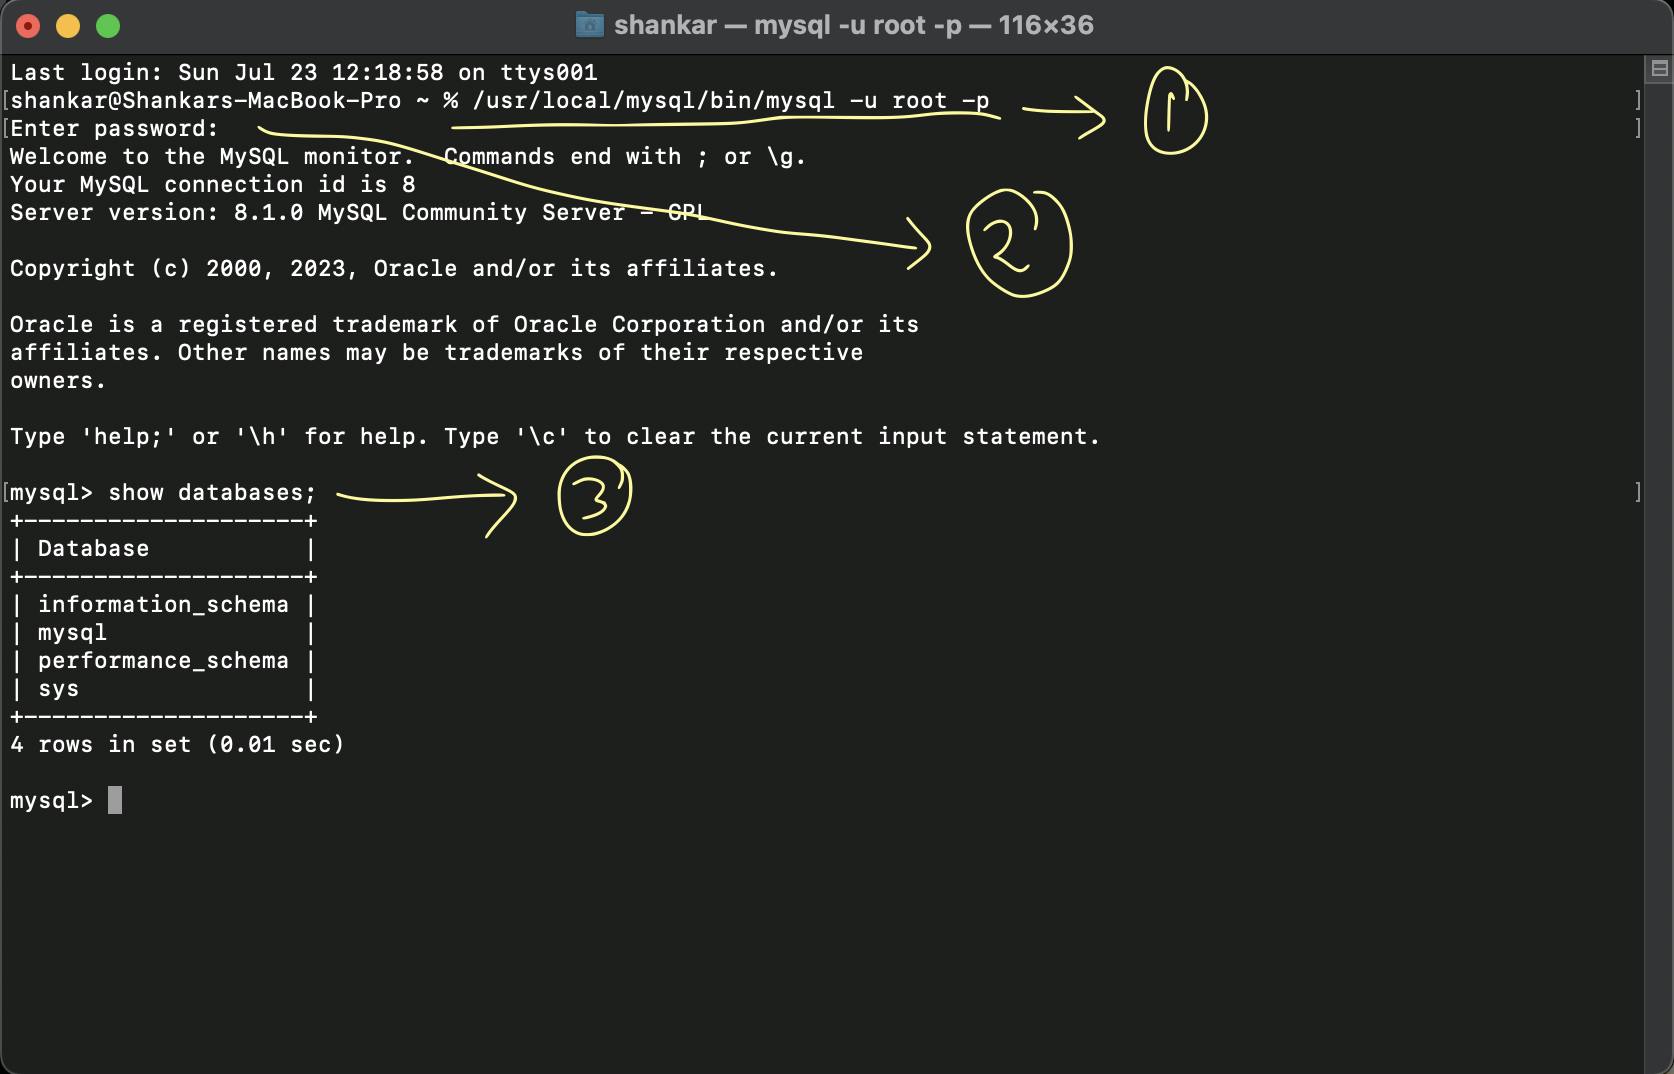
That concludes our journey, "MySQL Magic: The Simplest Way to Install on Your Local Machine". Stay tuned for more insightful content. Keep your spirits high and happy learning!
